Sentiment analysis is an example of applied Natural Language Processing (NLP). In this context, “sentiment” is almost interchangeable with text polarity. Text polarity is a measure from -1 to 1 of the sentiment of the text. The dictionary definition of sentiment is actually “one’s view or attitude towards something”, so this could include emotions from sadness to happiness to surprise. While it is possible to predict emotion, this article is going to focus on how positive or negative a text is. We’ll cover emotion in an article on emotion detection and how to do it.
In this article we’ll cover:
- What is Text Sentiment
- Text Sentiment vs Text Polarity vs Sentiment Analysis
- How to use AI to get Text Sentiment
- AI Text Sentiment with spaCy
- Sentiment Analysis with NLTK
- How to get the sentiment of a text with a web API
- Applications of Text Sentiment Analysis
- COVID headlines
- Summary of How to do Sentiment Analysis with AI
What is Text Sentiment?
Let’s first take a look at what text sentiment is. Text sentiment is the general sentiment of a text. It’s the general outlook provided by a text document. We are using text sentiment to measure polarity from a value of -1 to 1. For our means, sentiment will measure whether a text document is generally positive or negative. A naive measure of text sentiment simply takes an average of the sentiment of each word.
We will measure the total sentiment of a text as a weighted combination of the sentiment of different words, phrases, and sentences. You are free to decide how you’d like to weigh each word, phrase, or sentence. In our implementation examples, we’ll take automatic sentiments with spaCy and NLTK that you can extrapolate and adjust. The Text API uses a proprietary mix of sentiments from words, phrases, and sentences.
Text Sentiment vs Text Polarity vs Sentiment Analysis
Before we get into some implementation examples, let’s get a more clear picture of sentiment. There’s three phrases that are used pretty much interchangeably in the NLP space by most people. Text sentiment, text polarity, and sentiment analysis are only distinguished when you have specific use cases or speaking with NLP experts. Let’s get the definitions.
- Text sentiment – the overall view of a text including positivity, outlook, and emotion
- Text polarity – a measure from -1 to 1 of how polarizing (positive or negative) a text is
- Sentiment analysis – the process of determining the sentiment of a text document
In this article, we are discussing how to use sentiment analysis to determine the polarity of a text.
How Can I Use AI to Get the Sentiment of a Text?
Natural Language Processing is a subfield of Artificial Intelligence. Polarity is a common technique for many NLP pipelines. In this post, we’ll cover how to use two of the biggest Python NLP libraries and an API to get text sentiment. First we’ll do text sentiment with spaCy, then NLTK, and finally with The Text API.
AI Text Sentiment with spaCy
To get the sentiment of a text with spaCy we’ll need to install two libraries and download a model. We can do that by using the lines below in the terminal.
pip install spacy spacytextblob
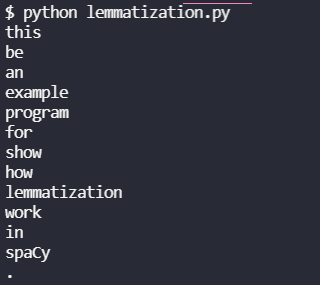
python -m spacy download en_core_web_smWe’ll begin our program the same way we always do, by handling the imports. We’ll import the spacy library and the SpacyTextBlob class from the spacytextblob package. Next, we’ll load up the model and add the spacytextblob to the NLP pipeline. We can use any text, for this example, we’ll just use a text description of The Text API. Then, we’ll create a document from the text using the NLP model. Finally, we’ll print out the overall polarity of the text from the model.
import spacy
from spacytextblob.spacytextblob import SpacyTextBlob

nlp = spacy.load("en_core_web_sm")
nlp.add_pipe('spacytextblob')
text = "The Text API is super easy to use and super useful for anyone who needs to do text processing. It's the best Text Processing web API and allows you to do amazing NLP without having to download or manage any models."
doc = nlp(text)

print(doc._.polarity)
Sentiment Analysis with NLTK
To follow this example using the NLTK library, we’ll have to install the NLTK library and download the three of its packages. We can do this with the lines below in the terminal.
pip install nltk
python
>>> import nltk
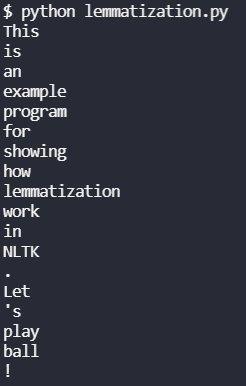
>>> nltk.download([“averaged_perceptron_tagger”, “punkt”, “vader_lexicon”])As always, we’ll start off our program with imports. We’ll need to import the SentimentIntensityAnalyzer class from the nltk.sentiment module. Then we’ll initialize an object of the SentimentIntensityAnalyzer class. We’ll use the same text here as we did for the spaCy model. Next, we’ll get the polarity_scores of the text from the SentimentIntensityAnalyzer object and print out the scores.
from nltk.sentiment import SentimentIntensityAnalyzer

sia = SentimentIntensityAnalyzer()
text = "The Text API is super easy to use and super useful for anyone who needs to do text processing. It's the best Text Processing web API and allows you to do amazing NLP without having to download or manage any models."
scores = sia.polarity_scores(text)
print(scores)
How to Get the Sentiment of a Text with an NLP API
For this example, we’ll need to install the requests library and get a free API key from The Text API. You can download the library with the line below in the terminal.
pip install requestsAs always, we will start our program with the imports, we need to import the requests library to send requests and the json library to parse the response. I also imported the API key from my config file, but you can import it from wherever you saved it or use it in this file. We’ll use the exact same text as we did with spaCy and NLTK.
We need to create some headers to send with the request. The headers will tell the server that we’re sending JSON content and pass the API key. The body will simply pass the text object. We also need to know the URL of the API endpoint. All we need to do is send a POST request and parse the response into a JSON object. The polarity will be the “text polarity” key of the returned object.
import requests
import json
from config import apikey

text = "The Text API is super easy to use and super useful for anyone who needs to do text processing. It's the best Text Processing web API and allows you to do amazing NLP without having to download or manage any models."
headers = {
    "Content-Type": "application/json",
    "apikey": apikey
}
body = {
    "text": text
}
url = "https://app.thetextapi.com/text/text_polarity"

response = requests.post(url, headers=headers, json=body)
polarity = json.loads(response.text)["text polarity"]
print(polarity)
Applications of Text Sentiment Analysis
Sentiment analysis for text can be applied in many ways. We can use it to get an idea of what people are really saying in reviews, how customers feel about our product, or even how employees feel about the company. We can also use it to analyze the news and see how positive or negative it is. In this section we’ll show an example of using text sentiment analysis to analyze COVID headlines over time.
Text Sentiment Polarity of COVID Headlines
One application of text sentiment analysis is to do analysis of the news. Since it’s been about two years into the COVID pandemic, analyzing COVID headlines could be interesting. I decided to do an analysis on the NY Times’ headlines about COVID over the last two years. What did I learn? That they were much more negative about COVID in the first year than they have been this year.


For a full tutorial, see Using AI to Analyze COVID Headlines.
Summary of How to do Sentiment Analysis with AI
In this article we learned about text sentiment, sentiment analysis, and text polarity. We learned that these terms are mostly interchangeable but have nuanced differences. Then we saw how we can use AI to get the sentiment of a text. We saw how to implement it in three different ways, with spaCy, NLTK, and The Text API. Finally, we saw an example of how we can apply text sentiment analysis.
I run this site to help you and others like you find cool projects and practice software skills. If this is helpful for you and you enjoy your ad free site, please help fund this site by donating below! If you can’t donate right now, please think of us next time.